Solar Tubes Cost
Written by webtechs

Solartube Price

If you are searching for either of the following phrases, “how much do solar tubes cost” or “tubular skylights cost”; this post should help! Here we help you understand more about solar tubes, how much they cost and if they are right for your home. On average, solar tubes cost about $750, vs the cost of a traditional skylight which is about $2,000. Solar tube installation costs ranged from $500 to $1,000 for the US.

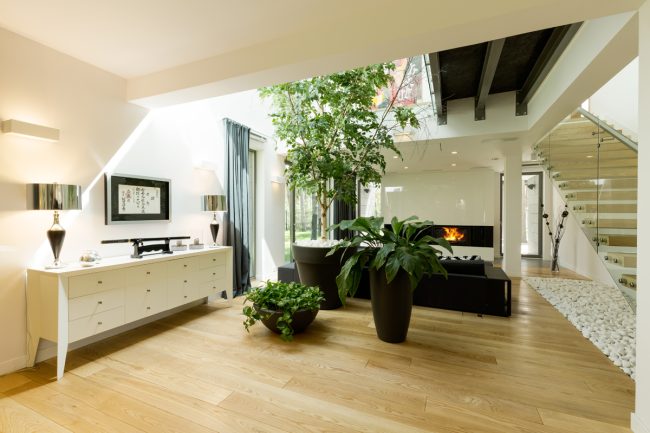
With the installation of solar tubes, you will obtain that natural light provided by skylights, but with less hassle and expense. If you have considered increasing the amount of daylight to either a dark hallway or kitchen, solar tubing is one option. Solar tubes offer plenty of indirect, warm light, at just a fraction of the costs of installing a traditional skylight.

How Do Solar Tubes or Tubular Skylights Work?

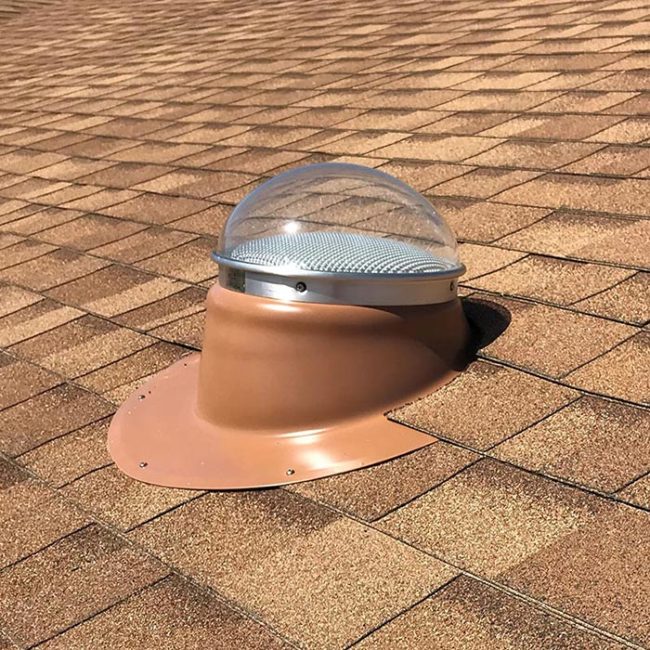
Solar tubes are commonly referred to as sun tubes, light tube, sun tunnels, or tubular skylights, and have a diameter of 10-inches to 14-inch tubing made from sheet metal and polished interior. The purpose of the interior is like a continuous mirror, which channels light over the entire length of the tube, which preserves the intensity of light. The daylight is captured at the roof, then delivered within the home.

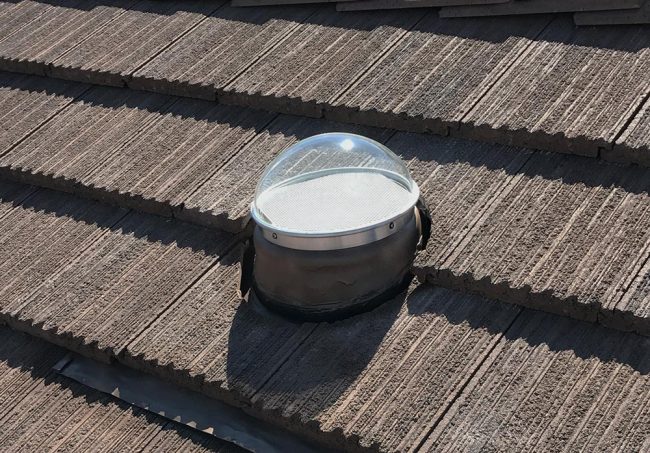
Solar tubing gets capped with weather-proof plastic globes on the roof, while the tube ends within a port-hole style diffuser within a room below the ceiling. Light is collected by the globe on the roof, then light is spread by the diffuser to produce a pure white glow, providing a dramatic effect. A new installation frequently has homeowners reaching to turn the light switch off as they leave the room. Learn more about how solar tubes work.

How Much Do Tubular Skylights or Solar Tubes Cost?

How Much Do Solar Tubes Cost

Solar tubes cost between $500 – $1,000 on average when installed professionally, whereas a traditional skylight averages $2,000 or more. However, if you are comfortable and handy with roof work, you may be able to install solar lights on your own with a kit costing around $200 – $400. Solar lights do not require additional drywall to be added, unlike a skylight. You also avoid having to alter framing or painting. *These are general estimates not an actual quote. Contact Elite Solar Lighting & Fans for an actual quote for your home or business.

How Much Light Do Solar Tubes Produce?

The smallest option is a 10-inch solar tube, which offers the equivalent of 3 100-watt bulbs, or enough for a 200 sq. ft. room. A 14-inch solar tube can increase the brightness of rooms up to 300 sq. ft.

Where Can Solar Tubes Be Installed In A Home?

The installation of solar tubes is popular in many locations, some common areas people prefer constant indirect light include:

  • Stairways
  • Hallways
  • Kitchens
  • Walk-in Closets
  • Laundry Rooms
  • Bathrooms

About the only place you would not want to place a light tube is directly above a screen, such as a TV or computer, as this can create annoying glare.

Can Solar Tubes Work In A 2 Story House?

If you are in a two-story house, it is possible to channel the daylight down through the layers and into the first floor. You will need to have a mechanical chase or closet for running the tube through. However, the installation can get complicated due to a floor requiring being cut, or if plumbing, wiring, or HVAC ducts are in the path.

Are Solar Tubes Tubes Right For Your House?

Solar tubes can help you lower your electric bill. Furthermore, due to installation not requiring alternations to the frame, there’s much less limitations when it comes to locating a solar tube for your needs. Take a look at the attic space to ensure there is enough room to run a light tube, should be straight. If there is an obstruction, such as flexible tubing or elbows this may be avoidable and/or moved. Installing solar tubes are rather simple when done within vaulted ceilings, as only about a foot of tubing will be needed. Read the pros and cons of solar tubes to figure out if they are right for you.

Evaluations to make in advance:

  • Roof slope: The majority of solar tube kits will provide flashing which may be installed to roofs that have a slope of 15 degrees (3-in-12 pitch) and up to 60 degrees (20-in-12 pitch).
  • Roof framing space: The spacing of standard rafters are 16-inches center, with plenty of space for either a 10-inch to 14-inch light tube. However, if you find the rafters are 24-inches center, you have the option of custom ordering a 21-inch light tube that can cover 600 sq. ft.
  • Roofing materials: Light tube kits have been designed for use with asphalt shingles, but can work well with shakes or wood shingles as well. There are flashing adapters available for tile or metal roofs.
  • Location: Mounting globes on southwest sections of the roof provide the highest quality results. Lcoate an area that requires running of tube that is 14ft or less. When the globe is positioned above the tagert area directly, it may be able to reflect up to 985 of the exterior daylight. However, tubes that must twist or turn can slightly reduce the quality of light produced.
  • Weather: If you’re located within an area with high humidity, then the interior of the tube may develop condensation and cause issues. By wrapping the light tube within R-19 or R-15 insulation, the condensation can be greatly reduced. Some solar tube manufacturers provide tubing sections that have small fans built within them for the purpose of removing the moist air and reducing or eliminating condensation. If you live within areas prone to hurricanes, you may want to opt for extra-hardy polycarbonate domes.

Elite Solar Lighting & Fans Is A Solar Tube Installer Located In Arizona


Elite Solar Lighting & Fans offers residential and commercial solar tube installation services throughout the entire united states, including Arizona, California, New Mexico, and more.

How To Clean Skylights
Written by webtechs

Best Way To Clean Skylights

Follow this step-by-step guide to get the best possible results when cleaning your tubular skylights.

Steps To Clean Skylights

Follow these five steps to clean your skylights properly:

  1. Get The Right Supplies
  2. Prepare Area
  3. Wash Skylights Gently
  4. Rinse Thoroughly
  5. Minimize The Streaking

Get The Right Supplies

Before jumping into this project, you must have the right supplies on hand for the task. Make sure you are equipped with the following:

  • Bucket
  • Rags Or Cloths
  • Long Mop Or Broom
  • Duct Tape
  • String
  • Mild Dish Soap
  • Plastic Tarp
  • Distilled White Vinegar
  • Towel Or Microfiber

Prepare Area

Once you have gathered all the proper materials for the job, it’s time to prepare the area for clean up. First, start by either moving or covering all nearby furniture. Next, place your plastic tarp on the floor, laying directly under the skylight. The tarp will be used to catch any fallen debris in the area. Mix your bucket with one gallon of water and a small amount of dish soap and swish. Place a dry rag at the end of the mop handle and use this to sweep back and forth.

Wash Skylights Gently

Remove the cloth from the pole, replacing it with a new one. Dip the cloth-covered end of the pole into your bucket mixed with water and dish soap. Wring out the excess water and begin washing at the top left corner of the pane. Work horizontally, then clean the light vertically. Wipe in a circular motion until the skylight has been wiped completely.

Rinse Thoroughly

Once the pane has been cleaned, empty and rinse the bucket. Replace it with fresh water and remove the rag from the pole. Wipe the entire skylight surface pane using the clean rag and fresh water. If needed, go over the pane a second time.

Minimize The Streaking

After removing the rag used to rinse the area, put a new dry towel or cloth on the pole. Remove any excess water by using side-to-side wipes, both vertically and horizontally.

Elite Solar Lighting & Fans Is A Solar Tube Installer Located In Arizona


Elite Solar Lighting & Fans offers residential and commercial solar tube installation services throughout the entire united states, including Arizona, California, New Mexico, and more.

How To Remove A Skylight
Written by webtechs

DIY Skylight Removal

Learn how to remove a skylight in four easy steps below.

Necessary Tools For Removing A Skylight

Start this process by gathering the necessary tools, including:

  • Roof bracket.
  • Flat pry bar.
  • Utility knife.
  • Power drill or screwdriver.
  • Staging plank.
  • Fall protection harness.

Step 1

  • Find the edge of the shingles which surround the bottom of the skylight.
  • Next, lift the shingles up.
  • Put a 4-foot long piece of a 2-by-4 where the shingles lay on the roof by using a hammer and nails.
  • Use a board to brace your feet while removing the skylight.

Step 2

  • Remove all the shingles surrounding the skylight as soon as possible.
  • Put a putty knife between the shingles being removed and the ones they overlap.
  • Using the claw of the pry bar, lift the roofing nails that secure the shingles.

Step 3

  • Find all the brackets securing the skylight to the roofing.
  • Using the pry bar, pry the brackets away from the roofing.
  • Make sure to pry with care to avoid damaging the roof and surrounding area.
  • When you pry the brackets, the skylight will rise.
  • Put the pry bar at the bottom frame of the skylight and roof, prying upwards if there are no brackets.

Step 4

  • Fully remove the skylight from the roof opening.

When Should You Remove A Skylight?

Here are a few signs that your skylight needs to be removed and replaced:

Cracks On Panes

The most obvious sign that you need a replacement is whenever you notice any cracks on the panes. Cracks will allow heat and water into the home. While the cracks will generally start small, the gaps can increase quickly over time. Not only will this reduce the skylight efficiency, it will also increase your heating costs.

Leaks

Leaks can be the worst possible problem facing your skylight. Remember, a skylight is just like a window – it’s part of your roofing. When leaks persist, this can cause damage to the surrounding areas, and create mold and mildew.

Discoloration

Skylights can become discolored over the years. Any yellowing will prevent sufficient light from entering the home. Furthermore, you may also notice some peeling or bubbling forming on the drywall surrounding the skylight at this time. Any time that the skylight fails to do its job at the highest level, a replacement is recommended.

Elite Solar Lighting & Fans Is A Skylight Installer Located In Arizona


Elite Solar Lighting & Fans offers residential and commercial solar tube installation services throughout the entire united states, including Arizona, California, New Mexico, and more.

Keep A Room Facing The Sun Cool
Written by webtechs

How To Keep A Room Facing The Sun Cool

Keeping a room facing the sun cool requires a mixture of design and functional factors. Factors like window coverings, blinds, awnings, and lightly colored furniture can decrease the sun’s effect on interior temperatures and help make the area more comfortable. A decrease in the amount of energy need to cool a room can also aid in cutting monthly energy bills.

Ways to Keep A Room Facing The Sun Cool

Sustaining a cool living environment is an essential factor of comfortable living on sunny days. There are several simple yet effective ways you can do to keep a room cool facing the sun. Below are the ways to keep a room facing the sun cool

Windows

A standard, double-paned window is going to allow nearly 3/4th of the sun’s heat to enter the room. Energy-efficient, double-paned windows decrease that amount without decreasing natural visible light. With lesser heat from the sun, you’re a/c unit won’t have work as hard to control the temperature.

Window Treatments

Utilizing drapery or curtains to cover sunlight facing windows throughout times of direct sunlight is going to keep the room cooler. Window treatments that have a lightly colored or reflective backing are ideal. Roller-type shades also offers protection from the heat of the sun. Adjustable blinds enable you to direct and control sunlight throughout the room. Totally closed, they offer a light and heat barrier.

Awnings

Adjustable and/or fixed awnings can block direct sunlight and at the same time allowing total use of the window(s). Awnings also allows the window to be opened for venting during hot times of the day to help in keeping the room cool.

Outdoor Plants

Placing trees and other outdoor shrubbery around windows can also give shade to decrease the direct heat of the sun. Larger leafed or thicker plants work the best to block the sun while at the same time allowing air-flow for great circulation. Stay away from planting on the south side of your home. This is going to reduce passive solar heating throughout the cooler months.

Lighting

With a lot of sunlight that brightens a room, light bulbs that generate heat might not be necessary. Turning off the lights can allow you’re A/C system to cool a room more effectively and provide some savings on energy bills.

Fans

Ceiling fans can help because they draw cooler air from the floor up to the ceiling, where the hot air goes to. Box type or window fans can be ran throughout the evening to pull the hot air out and draw the cooler air in from other opened windows.

Humidity

Humid air can make the room feel more warm. Decrease the humidity level with a room de-humidifier. Placing plants inside the room can also help manage humidity levels. Try to avoid activities that adds humidity to the air, like washing clothes or showering, throughout hotter periods of the day.

Elite Solar Lighting & Fans Is A Tubular Skylight Installer Located In Arizona


Elite Solar Lighting & Fans offers residential and commercial solar tube installation services throughout the entire united states, including Arizona, California, New Mexico, and more.

How To Remove A Skylight
Written by webtechs

How To Remove A Skylight

Learn how to remove a skylight in four easy steps below.

Necessary Tools For Removing A Skylight

Start this process by gathering the necessary tools, including:

  • Roof bracket.
  • Flat pry bar.
  • Utility knife.
  • Power drill or screwdriver.
  • Staging plank.
  • Fall protection harness.

Step 1

  • Find the edge of the shingles which surround the bottom of the skylight.
  • Next, lift the shingles up.
  • Put a 4-foot long piece of a 2-by-4 where the shingles lay on the roof by using a hammer and nails.
  • Use a board to brace your feet while removing the skylight.

Step 2

  • Remove all the shingles surrounding the skylight as soon as possible.
  • Put a putty knife between the shingles being removed and the ones they overlap.
  • Using the claw of the pry bar, lift the roofing nails that secure the shingles.

Step 3

  • Find all the brackets securing the skylight to the roofing.
  • Using the pry bar, pry the brackets away from the roofing.
  • Make sure to pry with care to avoid damaging the roof and surrounding area.
  • When you pry the brackets, the skylight will rise.
  • Put the pry bar at the bottom frame of the skylight and roof, prying upwards if there are no brackets.

Step 4

  • Fully remove the skylight from the roof opening.

When Should You Remove A Skylight?

Here are a few signs that your skylight needs to be removed and replaced:

Cracks On Panes

The most obvious sign that you need a replacement is whenever you notice any cracks on the panes. Cracks will allow heat and water into the home. While the cracks will generally start small, the gaps can increase quickly over time. Not only will this reduce the skylight efficiency, it will also increase your heating costs.

Leaks

Leaks can be the worst possible problem facing your skylight. Remember, a skylight is just like a window – it’s part of your roofing. When leaks persist, this can cause damage to the surrounding areas, and create mold and mildew.

Discoloration

Skylights can become discolored over the years. Any yellowing will prevent sufficient light from entering the home. Furthermore, you may also notice some peeling or bubbling forming on the drywall surrounding the skylight at this time. Any time that the skylight fails to do its job at the highest level, a replacement is recommended.

Elite Solar Lighting & Fans Is A Skylight Installer Located In Arizona


Elite Solar Lighting & Fans offers residential and commercial solar tube installation services throughout the entire united states, including Arizona, California, New Mexico, and more.

Benefits of the Sun
Written by webtechs

Benefits Of The Sun

From a scientific standpoint, sunshine has tons of benefits for our bodies. Below are 7 perfect reasons to go outside and get some sun.

Improves Sleep

Your body produces a hormone known as melatonin that is vital to helping you sleep. Since your body begins producing it when it gets dark, you typically begin to feel sleepy around 2 hours following the sun setting, in which is one of the reasons why our bodies naturally stay up more later during the summer months.

Research shows that 1 hour of natural sunlight in the morning is going to help you sleep better. Sunshine balances your circadian rhythm by letting your body know when it’s time to increase and/or decrease your melatonin levels. The more sunlight you can be exposed to, the greater chance your body is going to generate melatonin when it’s time for bed.

Reduces Stress

Melatonin additionally reduces stress sensitivity and being outside is going to help your body naturally balance melatonin, in which could help decrease your stress level. Furthermore, since you’re usually doing something active when outside (playing basketball, running, etc.), that additional exercise also aids in lowering stress.

Sustains Strong Bones

One of the greatest (and simplest) ways for getting Vitamin D is by being going outside. Our bodies create Vitamin D when they exposed to sunlight—around fifteen minutes in the sun a day is enough when you are fair skinned. And because Vitamin D aids your body in maintaining calcium and preventing brittle, slender, or malformed bones, soaking in the sunlight might be just what the doctor ordered.

Helps Keep The Weight Off

Going outside for thirty minutes anytime between 8 in the morning and noon has been associated to weight loss. There, obviously, might be other elements to this, but it appears there’s a connection between sunlight in the early hours and keeping the weight off.

Strengthens Our Immune System

Vitamin D is also vital for our immune system, and with continual exposure to sunlight, you are able to help improve it. Healthy immune systems are able to help decrease the chance of illness, infections, some cancers, and mortality following surgery.

Staves Off Depression

It’s not just in our heads; there’s scientific reasoning that being in the sunshine betters our moods. Sunshine increases your body’s serotonin levels, that is a chemical that improves your mood and aids you in staying calm and focused. Increased exposure to natural light could help in easing the symptoms of seasonal affective disorder—mood changes that usually happens in the fall and winter seasons when there are lesser hours of daylight.

Can Give You A Longer Life

Research that followed thirty thousand Swedish women shows that those that spent more time in the sun lived 6 months to 2 years longer than those with lesser sun exposure. More studies need to be done in this field, but it’s something scientists are continually researching.

Solar Attic Fan Installation In The Phoenix Valley

Elite Solar Lighting & Fans is proud to offer solar attic fan installation services to the entire Phoenix valley including: Phoenix, Chandler, Gilbert, Mesa, Tempe, Scottsdale, Glendale, Peoria, Surprise and more.

How Long Do Skylights Last?
Written by webtechs

How Long Do Skylights Last?

Skylights will last an average of 8-15 years, according to Plasteco. The life expectancy of the skylights will either increase or decrease depending on the quality of the light itself and installation.

How To Maximize A Skylight’s Life Expectancy

Here are a couple of the best possible ways to maximize your skylight’s lifespan:

Proper Skylight Positioning

Ideally, a skylight should produce/allow a sufficient amount of sunlight through its transparent panes. When you place the skylight in the best possible spot in your home, it will enhance the area’s illumination. Put the skylight in a position where it can maximize light reception during the installation process. If you are looking for the most light possible to enter the home, position the skylight facing south. Of course, a north facing skylight offers more of a softer lighting within the home.

Routine Maintenance

Throughout its life, a skylight will require some maintenance needs. While a daily or weekly cleaning is not necessary, it’s vital to watch for any signs of damage to the skylight. Routine maintenance simply means cleaning both sides of the light. Perform any maintenance tasks whenever you notice leaks or cracks in the lighting. A lack of maintenance is one of the biggest factors preventing a long and healthy life for your skylight. Contact the professionals for any and all maintenance needs today!

What Causes Damage To Skylights?

A few things can cause damage to your skylights. These factors include:

Faulty Repairs

Avoid any mistakes by choosing professional services for any repair needs. Leaks or cracks will require professional care.

Poor Installation

This is the number one reason why a skylight’s life expectancy will decrease. Poor installations will ultimately lead to cracks and leaks. If the skylight is not in the best spot in the home or sealed improperly, this can cause numerous issues.

When Should You Replace A Skylight?

Here are a few signs that your skylight needs to be replaced:

Cracks On Panes

The most obvious sign that you need a replacement is whenever you notice any cracks on the panes. Cracks will allow heat and water into the home. While the cracks will generally start small, the gaps can increase quickly over time. Not only will this reduce the skylight efficiency, it will also increase your heating costs.

Leaks

Leaks can be the worst possible problem facing your skylight. Remember, a skylight is just like a window – it’s part of your roofing. When leaks persist, this can cause damage to the surrounding areas, and create mold and mildew.

Discoloration

Skylights can become discolored over the years. Any yellowing will prevent sufficient light from entering the home. Furthermore, you may also notice some peeling or bubbling forming on the drywall surrounding the skylight at this time. Any time that the skylight fails to do its job at the highest level, a replacement is recommended.

Elite Solar Lighting & Fans Is A Skylight Installer Located In Arizona


Elite Solar Lighting & Fans offers residential and commercial solar tube installation services throughout the entire united states, including Arizona, California, New Mexico, and more.

How To Replace A Skylight Dome
Written by webtechs

How To Replace A Skylight Dome

Quality skylight domes are made of acrylic and polycarbonate, in most cases. So, what causes damage to skylight domes and how can you replace one of these domes?

If you are searching for “how to replace a skylight dome“, we’re here to help!

Ways To Replace A Skylight Dome

Here is the best way to replace a typical skylight dome:

  • Start by drilling the rivet out.
  • Remove all existing trims on the skylight.
  • Pull off the existing (broken) skylight dome.
  • Replace the broken skylight dome.
  • Then replace the removed trims.
  • Rivet the trims back together.

Here is the best way to replace a traditional frame and dome:

  • Remove either the rivets or screw first.
  • Lift the frame and dome entirely.
  • Replace it with a new (traditional) frame and dome.
  • Rivet the new frame/dome so that it matches the old one.

How can you replace your dome with a framed sky window and glass? Follow these tips:

  • Entirely remove the frame and dome.
  • Make modifications, if necessary.
  • Custom fit your brand new frame window and glass.
  • Rivet the new skylight window frame.

What Causes Damage To Skylight Domes?

Several different weather situations can damage your skylight domes, making a replacement necessary. Here are a few of those situations:

  • Wind: Wind can change how any hailstorm reacts to the impacted area. Wind can change the speed at which the hail falls.
  • Hail: The size of the hail is the biggest issue here. Hail can cause noticable damage to your skylights.
  • Roofing Material: Some materials have the ability to absorb the impact of hailstorms. Hail can permanently dent metal roofing. Tile roofs do protect well against hailstorms.
  • Glass: Only bigger, more intense hailstorms have been shown to break glass.
  • Polymer: These domed skylights can withstand smaller/medium-sized storms. However, all materials are likely to be damaged during large hailstorms.

Elite Solar Lighting & Fans Is A Skylight Installer Located In Arizona


Elite Solar Lighting & Fans offers residential and commercial solar tube installation services throughout the entire united states, including Arizona, California, New Mexico, and more.

How To Clean Skylights
Written by webtechs

How To Clean Skylights

Follow this step-by-step guide to get the best possible results when cleaning your tubular skylights.

Steps To Clean Skylights

Follow these five steps to clean your skylights properly:

  1. Get The Right Supplies
  2. Prepare Area
  3. Wash Skylights Gently
  4. Rinse Thoroughly
  5. Minimize The Streaking

Get The Right Supplies

Before jumping into this project, you must have the right supplies on hand for the task. Make sure you are equipped with the following:

  • Bucket
  • Rags Or Cloths
  • Long Mop Or Broom
  • Duct Tape
  • String
  • Mild Dish Soap
  • Plastic Tarp
  • Distilled White Vinegar
  • Towel Or Microfiber

Prepare Area

Once you have gathered all the proper materials for the job, it’s time to prepare the area for clean up. First, start by either moving or covering all nearby furniture. Next, place your plastic tarp on the floor, laying directly under the skylight. The tarp will be used to catch any fallen debris in the area. Mix your bucket with one gallon of water and a small amount of dish soap and swish. Place a dry rag at the end of the mop handle and use this to sweep back and forth.

Wash Skylights Gently

Remove the cloth from the pole, replacing it with a new one. Dip the cloth-covered end of the pole into your bucket mixed with water and dish soap. Wring out the excess water and begin washing at the top left corner of the pane. Work horizontally, then clean the light vertically. Wipe in a circular motion until the skylight has been wiped completely.

Rinse Thoroughly

Once the pane has been cleaned, empty and rinse the bucket. Replace it with fresh water and remove the rag from the pole. Wipe the entire skylight surface pane using the clean rag and fresh water. If needed, go over the pane a second time.

Minimize The Streaking

After removing the rag used to rinse the area, put a new dry towel or cloth on the pole. Remove any excess water by using side-to-side wipes, both vertically and horizontally.

Elite Solar Lighting & Fans Is A Solar Tube Installer Located In Arizona


Elite Solar Lighting & Fans offers residential and commercial solar tube installation services throughout the entire united states, including Arizona, California, New Mexico, and more.

How Much Do Tubular Skylights Cost
Written by webtechs

How Much Do Tubular Skylights Cost?

On average, tubular skylights will cost $450+ in the U.S. in 2021. Vented skylights, meanwhile, will cost upwards of $750, according to Thumbtack.

If you are searching for “tubular skylights cost“, this article will help!

Tubular Skylights

Tubular skylights are typically 10 to 14-inch diameter tubes that are installed directly into a roof. Then, the lights are covered with glass or even plexiglass which lets natural light into your home. These skylights have the exact same illuminating effect of a few 100-watt light bulbs. They are capable of lighting a 200-square-foot room.

To soften any glare, these tubes will have a diffuser in one end. However, because you’ll have a tube stuck in your roof, there will not be a view provided, unlike fixed or vented skylights. Fixed skylights vary widely in price, costing anywhere from $150-$1,000. A fixed double-domed skylight starts at $450+.

Installation Requirements

Since the installations don’t need alternations to framing, there are not many limitations as to where you will be able to locate your light tube. Remember and check the attic, ensure there’s enough room or you to do a straight run. However, should you come across an obstruction, you can always use elbows and/or flexible tubing to go around it. Vaulted ceiling makes it easy to install light tubes as you will only need 12 inches off tubing (take or give an inch).

The following evaluations should be made in advance:

Weather:

Living in an area that has high humidity can cause condensation to the interior of the tube can cause issues. You can cut down on the amount of condensation by wrapping the tube up using (R-15) or (R-19) insulation. There are a few manufacturers who provide sections of tubing that have small fans built in to them to help in removing any moist air. Anyone living in an area that is prone to hurricanes can opt to have an extra hardy dome made of poly carbonate.

Location:

You will get the best results from your globe if it is mounted on the southwest side of the roof. In choosing the spot where to run the tube is required to make sure that it is 14 feet in length, or less. I you place the globe right above the target room, it could convey up to 98% more exterior light. If the tube is able to twist and turn, you will get a minimal amount of light.

Roof framing spacing:

The standard rafters should be spaced at 16” on center, and gaped enough to fit a 10” or a 14” tube. Should your homes rafters be spaced at 16” on center, they have available a special order for a 21” tube that has light coverage for up to 600 square feet.

Roofing material:

The kits have been designed having asphalt shingles in the idea, however, they also work well with shakes and/or shingles. With flashing adapters available to use for the metal or tile roofing’s.

Roof slope:

Many of the light kits will include flashing which is installed on roof having slopes that range between 150 (having a 3” 12 pitch) or a 600 (a n20” 12 pitch).

Tubular Skylights Pros & Cons

Tubular Skylight Pros

  • Light your home or office and save money on electricity
  • Natural source of daylight with no heat gain or glare
  • Won’t fade your furniture or clothing
  • Almost no repairs or maintenance
  • Cost less to install than traditional skylights and doesn’t require any major construction
  • You can receive federal tax credits that will help lower the cost of installation
  • No loss of cooling or heating energy
  • Leak and damage proof design
  • Dimmer kits can be installed to block out light in entertainment rooms
  • Won’t build water condensation over time
  • Beneficial in selling your home faster and a preferred upgrade to Realtors
  • Our construction is quality built and made for extreme Arizona temperatures

Tubular Skylight Cons

  • Tubular skylights don’t offer a direct look at the sky
  • Tubular skylights can’t be opened like traditional skylights
  • More expensive to install over traditional skylights
  • Damaged flashing can lead to roof leaks if someone tries to customize the install
  • Can’t block out light for entertainment rooms without a dimmer kit installed
  • Not all are made for extreme temperatures

By considering the pros and cons of tubular skylights, you can make a better choice on the type of natural lighting system for your business or home.

Elite Solar Lighting & Fans Is A Solar Tube Installer Located In Arizona


Elite Solar Lighting & Fans offers residential and commercial solar tube installation services throughout the entire united states, including Arizona, California, New Mexico, and more.

1 2 3